Alert Rules
Alert Rules decide which of your clients' security events need your attention. When an event matches a rule, the rule opens a ticket in your PSA — or sends an email while no PSA is connected.
Find this page at Partner Console > Controls > Alert Rules. The badge next to it in the menu shows how many rules you have.
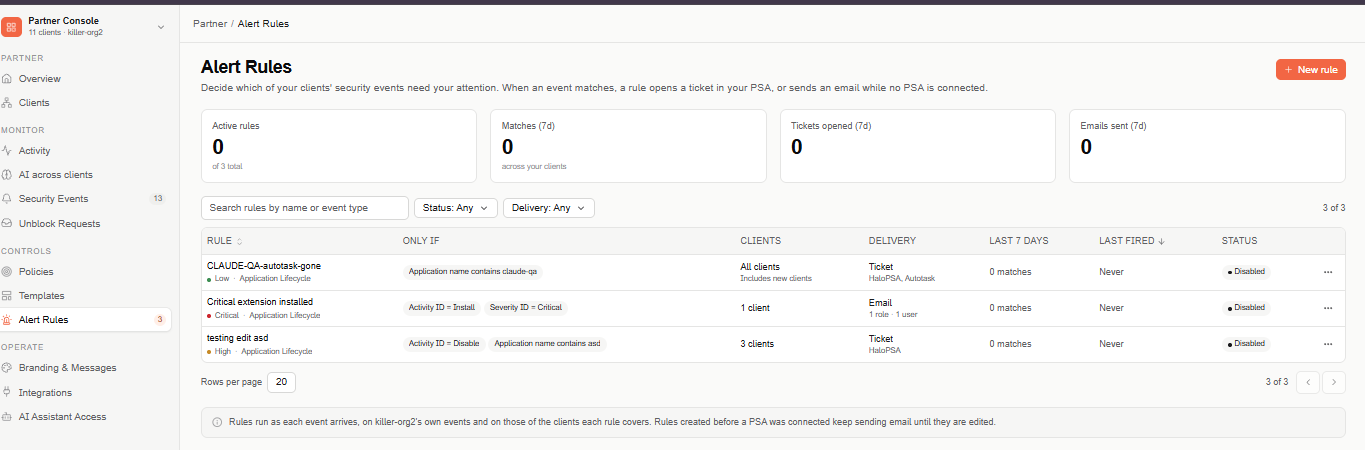
Rules run as each event arrives, on your partner organization's own events and on those of the clients each rule covers.
Overview metrics
- Active rules — enabled rules, out of the total.
- Matches (7d) — events that matched a rule in the last 7 days, across your clients.
- Tickets opened (7d) — tickets the rules opened in your PSA in the last 7 days.
- Emails sent (7d) — alert emails sent in the last 7 days.
Rules table
- Rule — the rule's name, with its severity and event type below it. Select the name to edit the rule.
- Only if — the conditions an event must meet.
- Clients — All clients (including new ones), or how many clients the rule covers.
- Delivery — Email (with how many roles and users receive it) or Ticket (with the PSAs it opens tickets in).
- Last 7 days — how many events matched the rule.
- Last fired — when the rule last matched, or Never.
- Status — Active or Disabled.
Use Search rules by name or event type and the Status and Delivery filters to narrow the list. The table is sorted by Last fired, newest first.
Each row's ⋯ menu lets you Disable or Enable the rule, and Delete it. A disabled rule is kept but doesn't run.
Create a rule
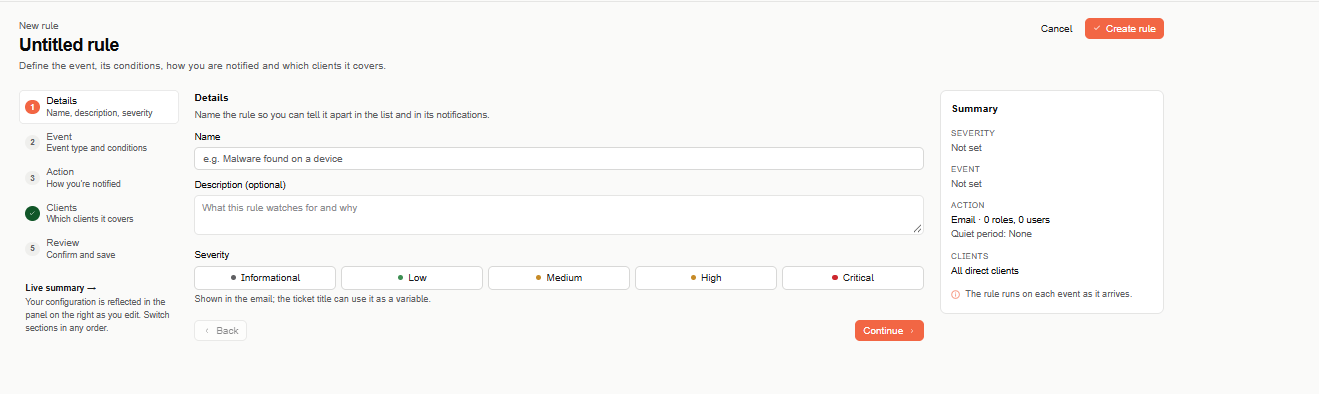
Select + New rule. The editor has five steps — Details, Event, Action, Clients, and Review — and a Summary panel on the right that updates as you go.
Step 1: Details
Enter a Name (for example, "Malware found on a device") and an optional description, and choose the Severity: Informational, Low, Medium, High, or Critical. The severity is shown in the email, and the ticket title can use it as a variable.
Step 2: Event
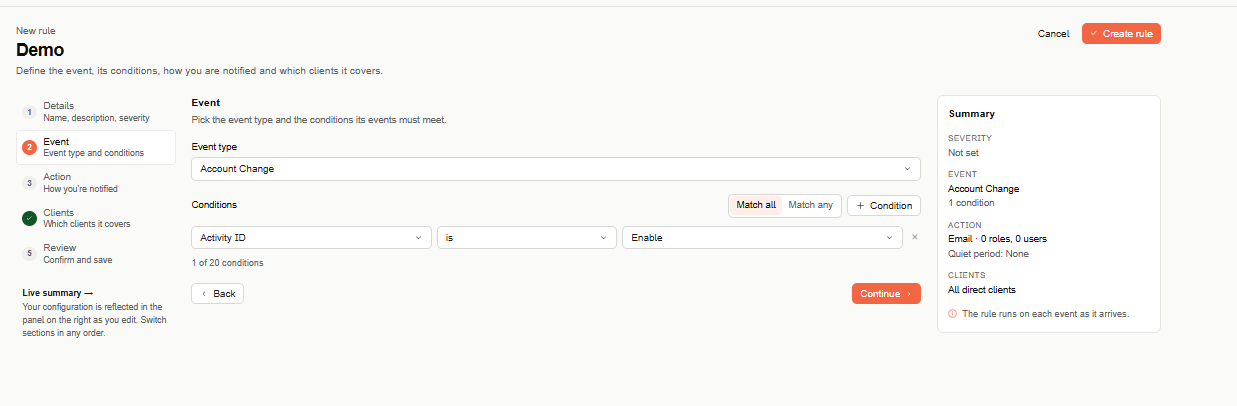
- Choose the Event type — for example, Account Change, Application Lifecycle, Authentication, Device Config State Change, Device Inventory Info, Entity Management, User Inventory Info, User Management, or Web Resources Activity. These are the same event types as Security Events.
- Add Conditions the event must meet — a field (such as Activity ID or Severity ID), an operator (such as is or contains), and a value. Select + Condition to add more, up to 20.
- Choose Match all (every condition must be true) or Match any (at least one).
Step 3: Action
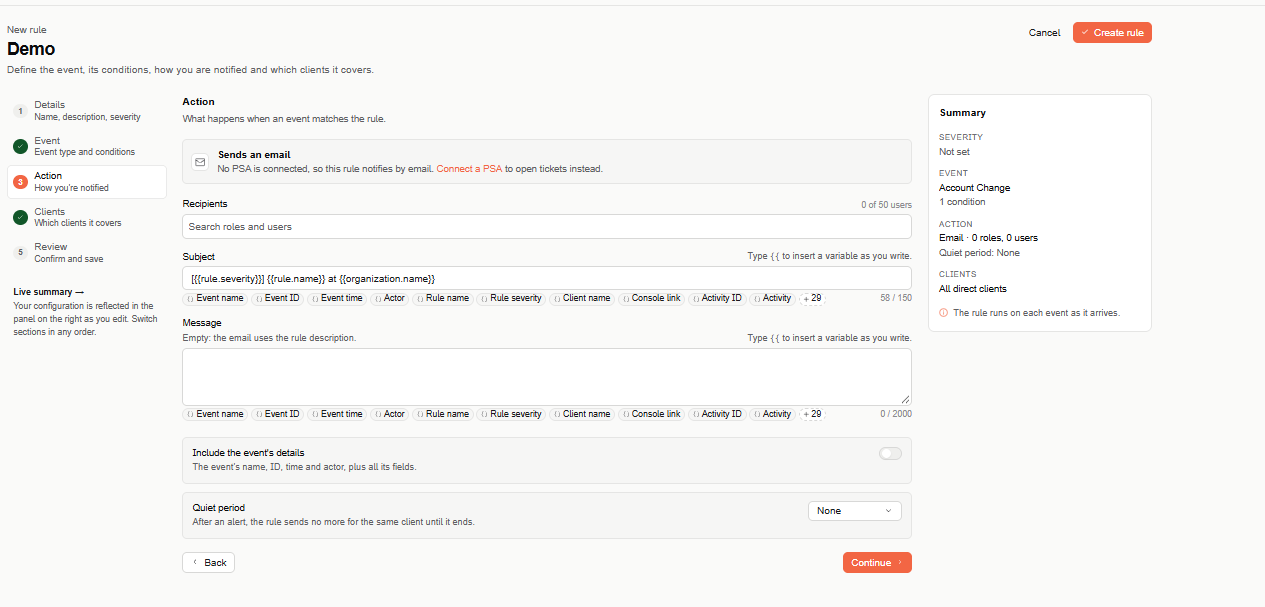
What happens when an event matches the rule. The step tells you which delivery the rule uses and why:
- Sends an email — when no PSA is connected. Choose the Recipients (roles and users), and edit the Subject and Message. If you leave the message empty, the email uses the rule's description.
- Opens a ticket — when a PSA (Autotask or HaloPSA) is connected in Integrations. Check the PSAs to open tickets in, and edit the ticket's Title and Details. The other ticket fields come from each PSA's ticket defaults.
In the subject, message, title, and details, type {{ or select one of the variables below the field — for example, Event name, Event time, Actor, Rule name, Rule severity, Client name, or Console link — to insert event and rule data.
Also set:
- Include the event's details — adds the event's name, ID, time, actor, and all its fields.
- Quiet period — after an alert, the rule sends no more for the same client until it ends: None (default), 15 minutes, 1 hour, 4 hours, 1 day, or 7 days.
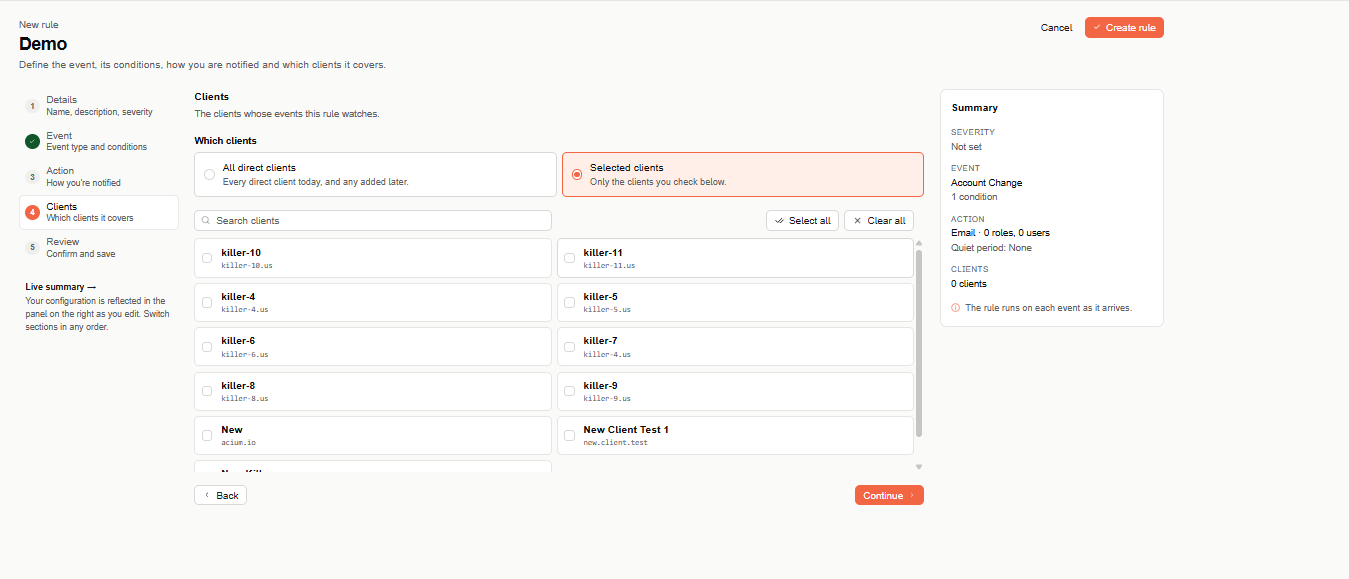
Step 4: Clients
Choose the clients whose events the rule watches:
- All direct clients — every direct client today, and any added later.
- Selected clients — only the clients you check. Use Search clients, Select all, or Clear all.
Step 5: Review
Check the name, severity, event type, conditions, action, subject, quiet period, and clients. Select Edit on any row to go back to that step.
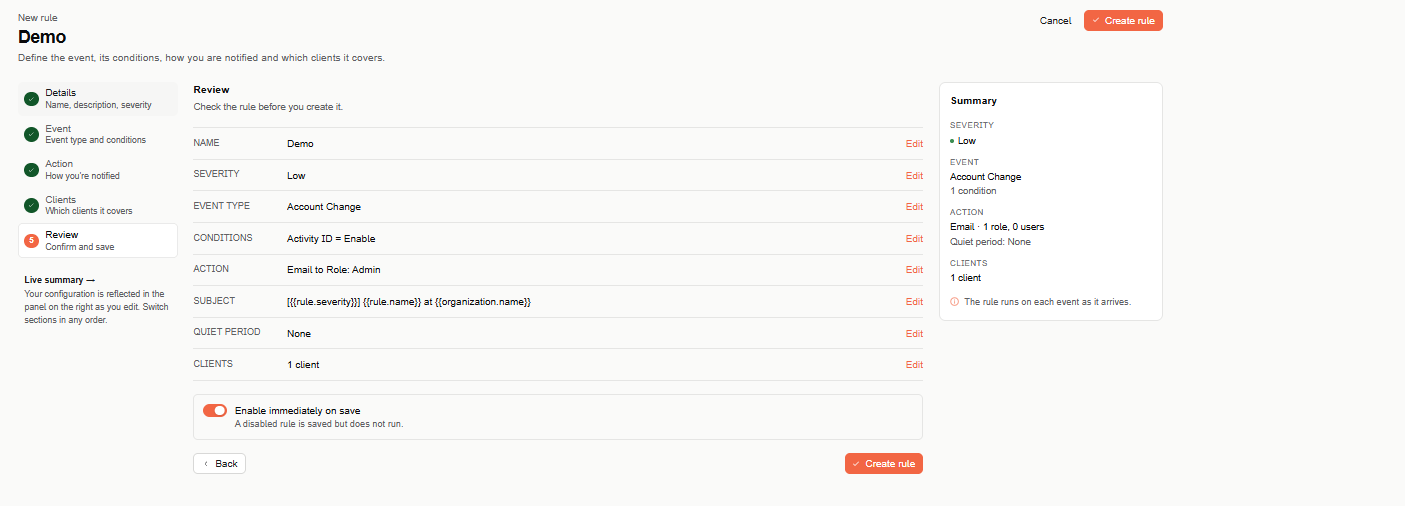
Enable immediately on save is on by default; turn it off to save the rule disabled. Select Create rule to finish.
Rules created before a PSA was connected keep sending email until you edit them.
Edit a rule
Select a rule's name in the table to open it in the same editor, make your changes, and save.