Data Controls
Data Controls let you create named protections that restrict what users can do on a page — block copy, paste, upload, download, camera, or microphone, or mask sensitive data. Apply a control to URLs, categories, or everywhere, and deploy it to users, groups, or everyone in the organization.
Find this section at Define > Protect > Data Controls.
To restrict AI tools specifically — block a tool, allow it only with a corporate account, or control installed AI apps — use AI Controls. AI Controls profiles target tools from a catalog, so you don't need to write URLs or pick categories.
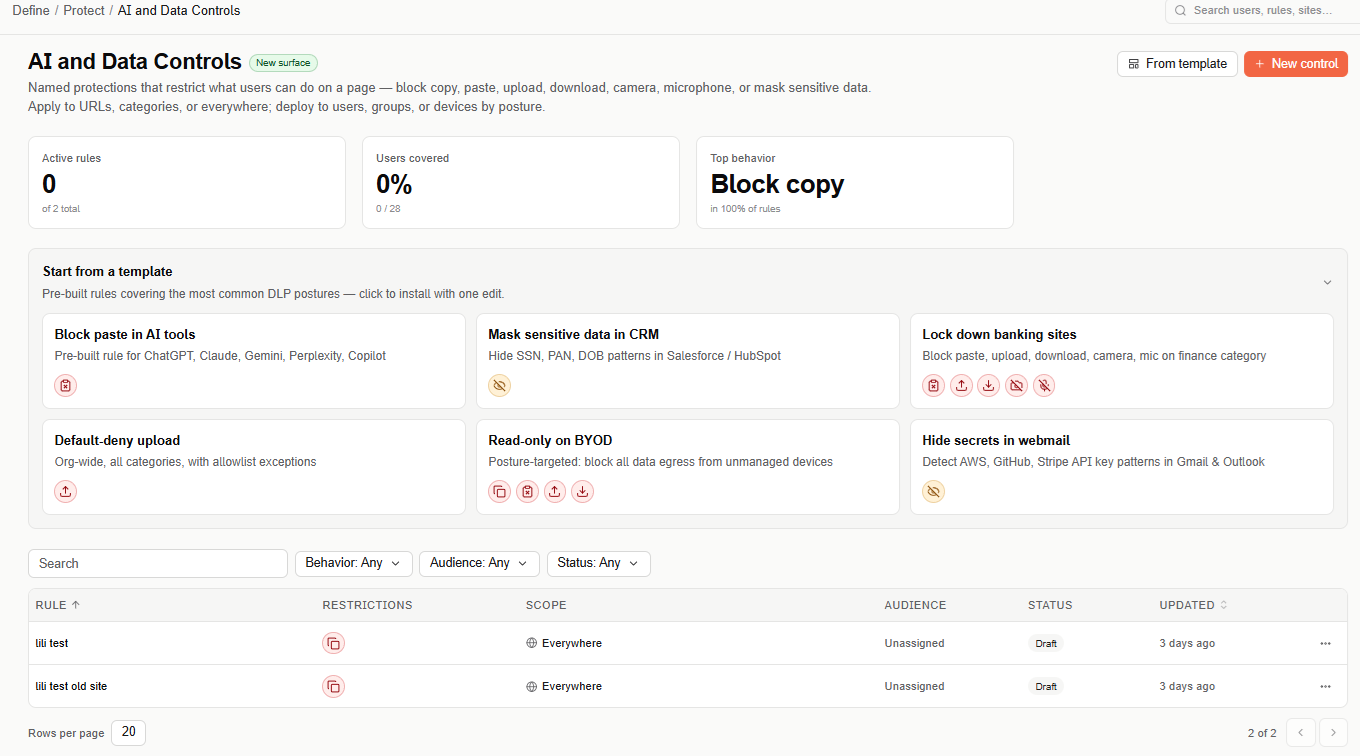
Overview metrics
The top of the page shows three stats for the rules configured in your organization:
- Active rules — number of enabled rules out of the total configured.
- Users covered — the percentage and count of users in the org matched by at least one rule.
- Top behavior — the most common restriction across your active rules (for example, Block copy).
Start from a template
Templates are pre-built rules covering common data-loss-prevention (DLP) postures. Selecting a template opens the same rule wizard used for a custom rule, with the restrictions, scope, and audience already filled in — you only need to review and adjust before deploying.
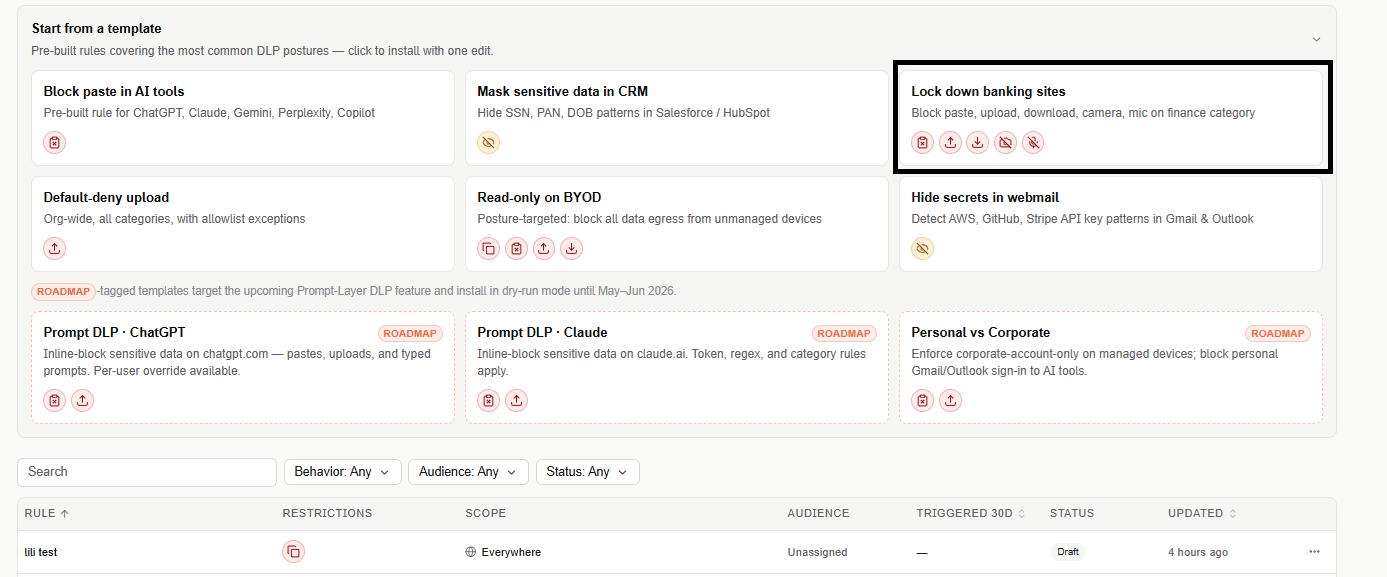
Available templates:
| Template | What it does |
|---|---|
| Block paste in AI tools | Pre-built rule for ChatGPT, Claude, Gemini, Perplexity, Copilot |
| Mask sensitive data in CRM | Hides SSN, PAN, and DOB patterns in Salesforce / HubSpot |
| Lock down banking sites | Blocks paste, upload, download, camera, and microphone on the finance category |
| Default-deny upload | Org-wide, all categories, with allowlist exceptions |
| Read-only on BYOD | Posture-targeted — blocks all data egress from unmanaged devices |
| Hide secrets in webmail | Detects AWS, GitHub, and Stripe API key patterns in Gmail and Outlook |
Templates tagged ROADMAP — Prompt DLP · ChatGPT, Prompt DLP · Claude, and Personal vs Corporate — target the upcoming Prompt-Layer DLP feature and install in dry-run mode until May–Jun 2026.
Create a custom rule
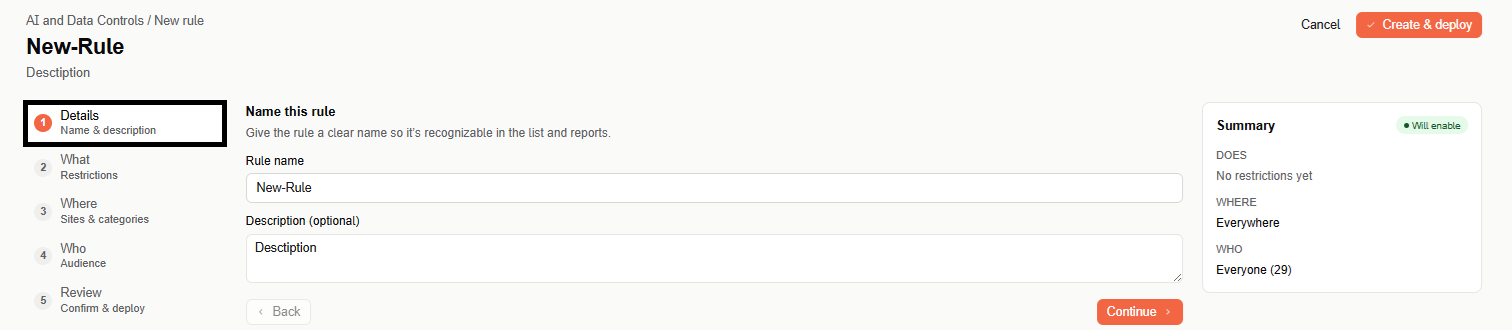
If none of the templates fit, select + New control to build a rule from scratch. The wizard has five steps, and a live summary panel on the right (DOES / WHERE / WHO) reflects your configuration as you go — you can switch between steps in any order.
Step 1: Details
Give the rule a name and an optional description so it's recognizable in the list and in reports.
Step 2: What — Restrictions
Pick one or more restrictions to apply. Multiple restrictions can stack — they all enforce when the rule's scope matches.
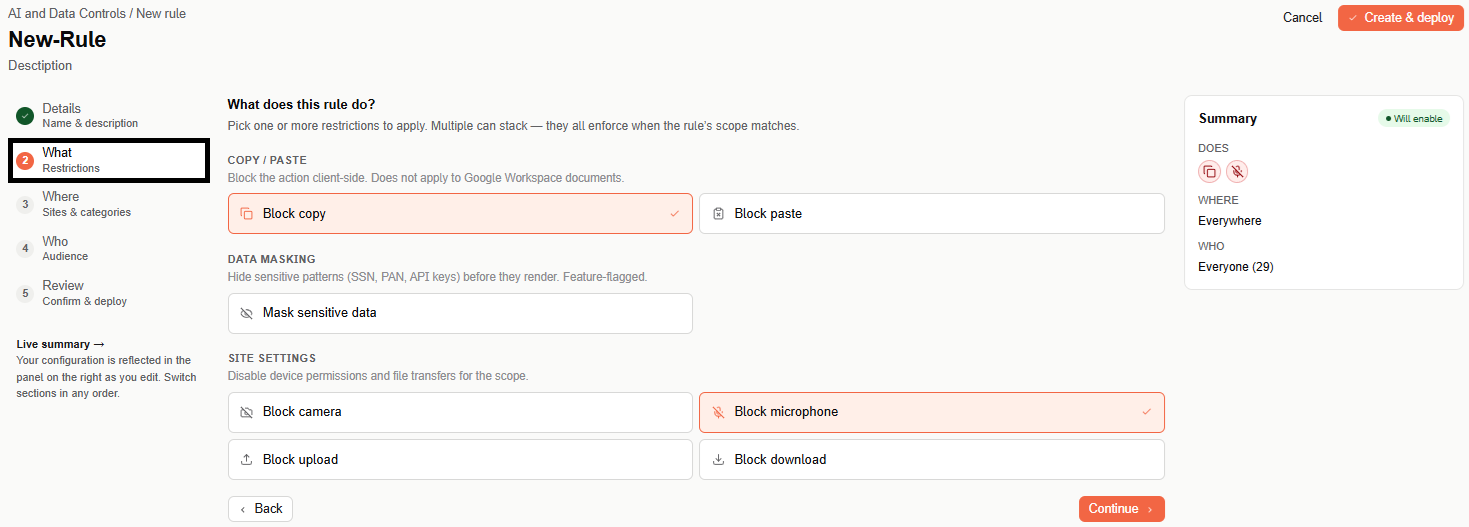
- Copy / paste — Block copy, Block paste. Blocks the action client-side; does not apply to Google Workspace documents.
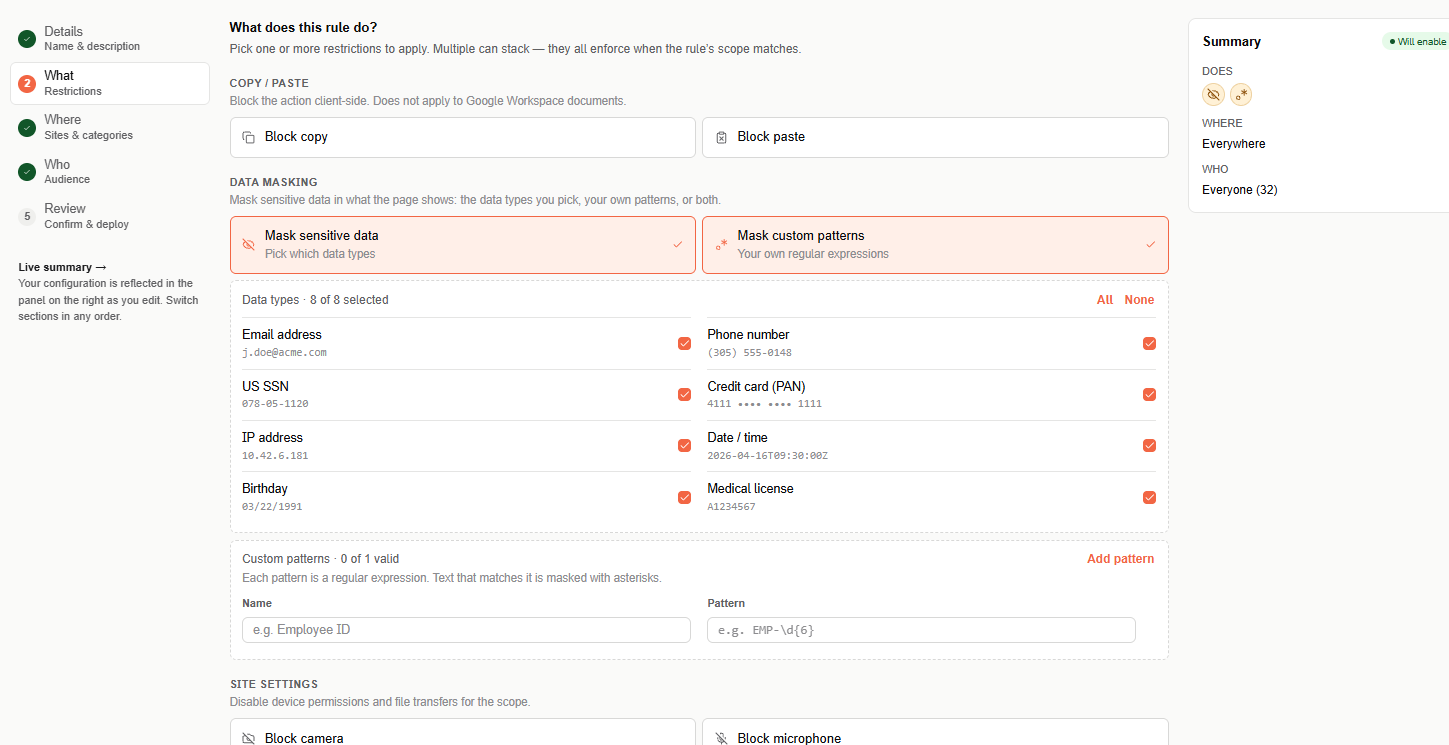
- Data masking — Mask sensitive data and Mask custom patterns. See Data masking below.
- Site settings — Block camera, Block microphone, Block upload, Block download. Disables device permissions and file transfers for the rule's scope.
Data masking
- Mask sensitive data — pick which data types to mask: Email address, Phone number, US SSN, Credit card (PAN), IP address, Date / time, Birthday, and Medical license. Use All or None to select or clear them all.
- Mask custom patterns — select Add pattern, give it a Name (for example,
Employee ID), and enter the Pattern as a regular expression (for example,EMP-\d{6}). A pattern is applied exactly as written, so it's case-sensitive unless the expression says otherwise.
You can use either option or both. Only the data types you select and the values matching your patterns are masked — everything else stays visible. Rules created before you could pick data types keep masking all eight.
On the rule's sites, the extension replaces matching values with *****:
- In what the page shows — when the page loads, when its URL changes, and when the policy changes.
- In what the person types or pastes into a text field of a form — a pasted value is masked as soon as it's pasted; a typed value is masked as soon as the person types a space or punctuation after it, leaves the field, or submits the form. The site receives
*****, not the original value. This applies to every rule with data masking, including existing ones.
Password, email, URL, and other typed fields are never masked, and undo (Ctrl+Z) doesn't bring a masked value back. Each form submitted with masked data generates one masking event in Security Events, listing the masked types and pattern names — never the values.
Data masking doesn't currently cover fields outside a form (such as a webmail compose window), content inside embedded frames, or the content of uploaded files. The person isn't notified that data was masked.
On an AI tool, if an AI Controls profile reaches the person at the same level as a Data Controls rule or closer, the AI Controls profile's masking applies there instead of the rule's.
Step 3: Where — Sites & categories
Choose the pages the restrictions enforce on:
- Everywhere — applies on every page the agent sees.
- Specific URLs — add one or more sites or URL patterns.
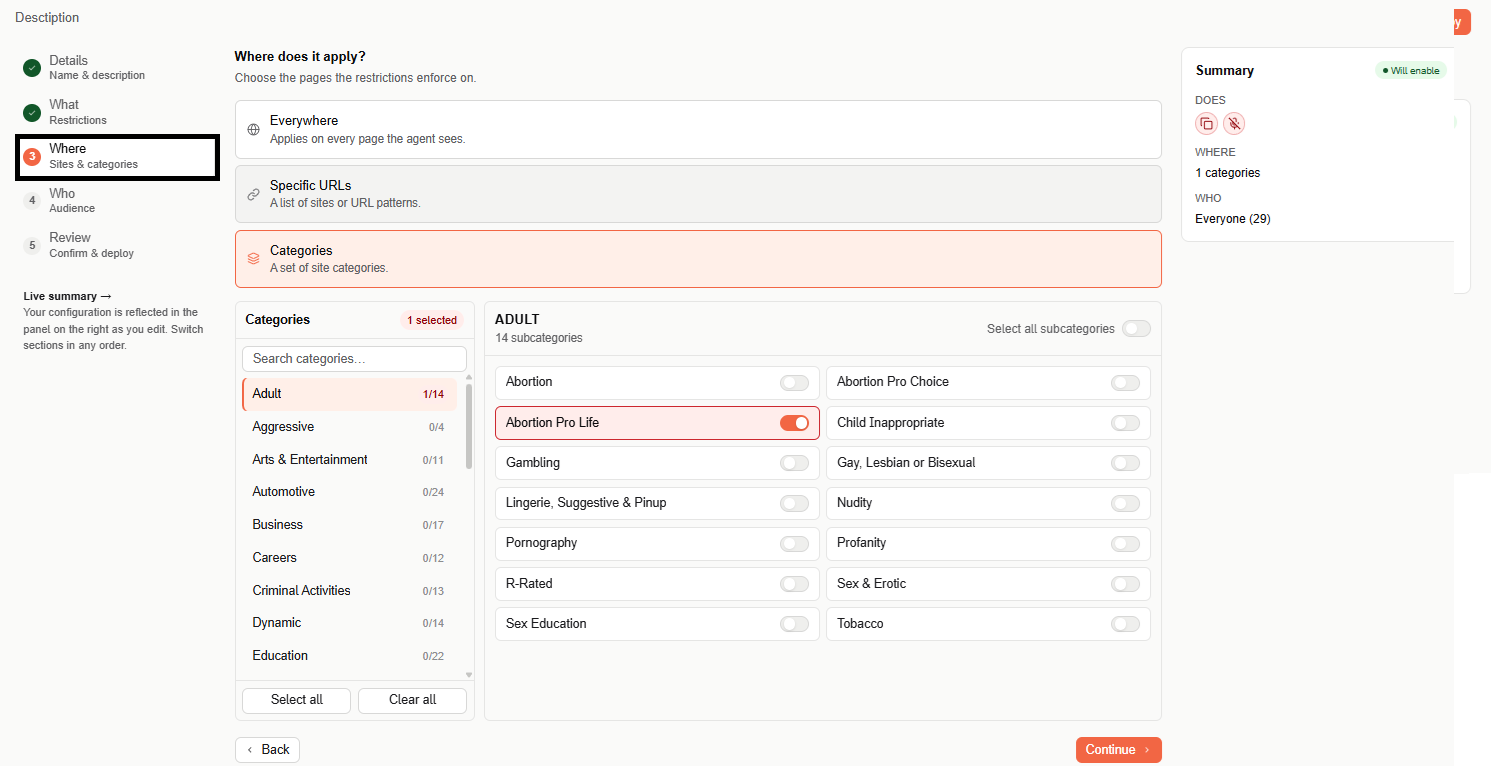
- Categories — select from a list of site categories and subcategories.
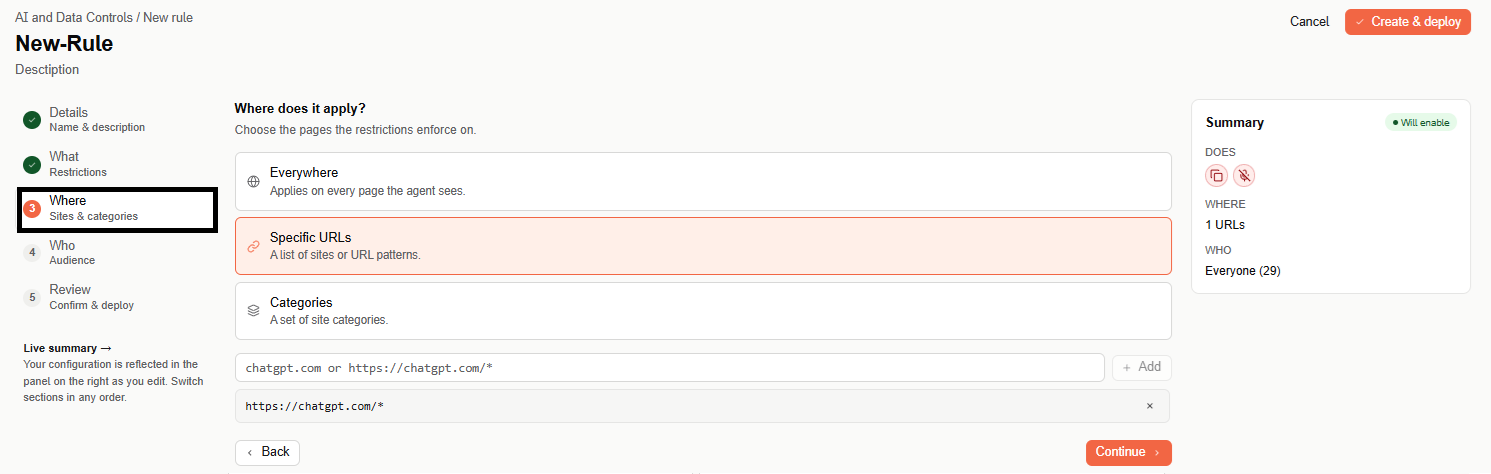
When Specific URLs is selected, add each site or URL pattern (for example, chatgpt.com or https://chatgpt.com/*) one at a time.
When Categories is selected, a searchable category list appears on the left — each category shows how many of its subcategories are selected (for example, "Adult 1/14"). Selecting a category shows its subcategories on the right as individual toggles. Use Select all subcategories (top right of the subcategory panel) to toggle every subcategory in the category you're viewing, or use Select all / Clear all (bottom of the category list) to select or clear every category and subcategory at once.
Step 4: Who — Audience
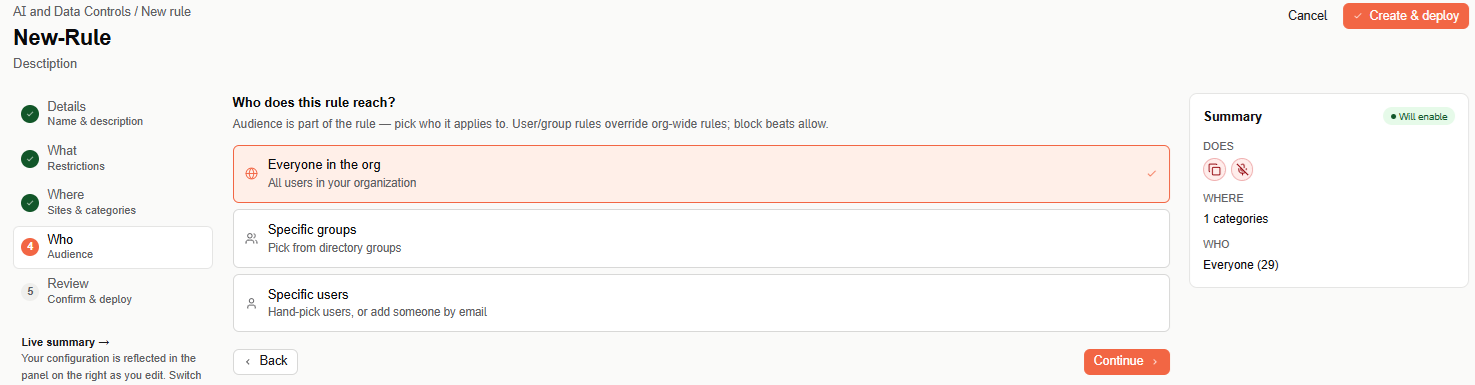
Choose who the rule applies to. User and group rules override org-wide rules, and block always beats allow.
-
Everyone in the org — all users in your organization.
-
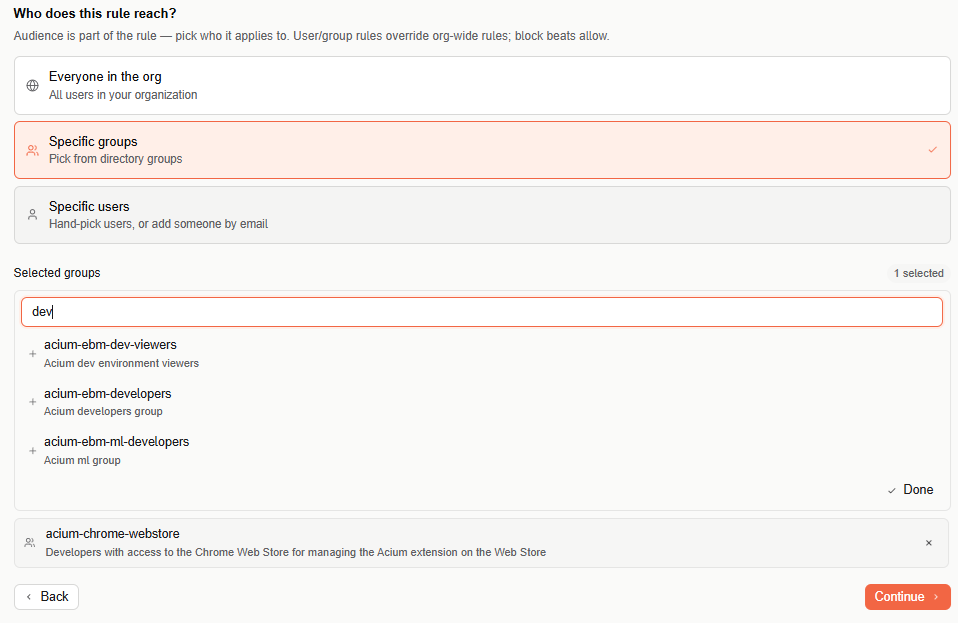
Specific groups — search the directory and select one or more groups. Each result shows a short description of the group. Selected groups appear as removable chips below the search box; select Done when you're finished.
-
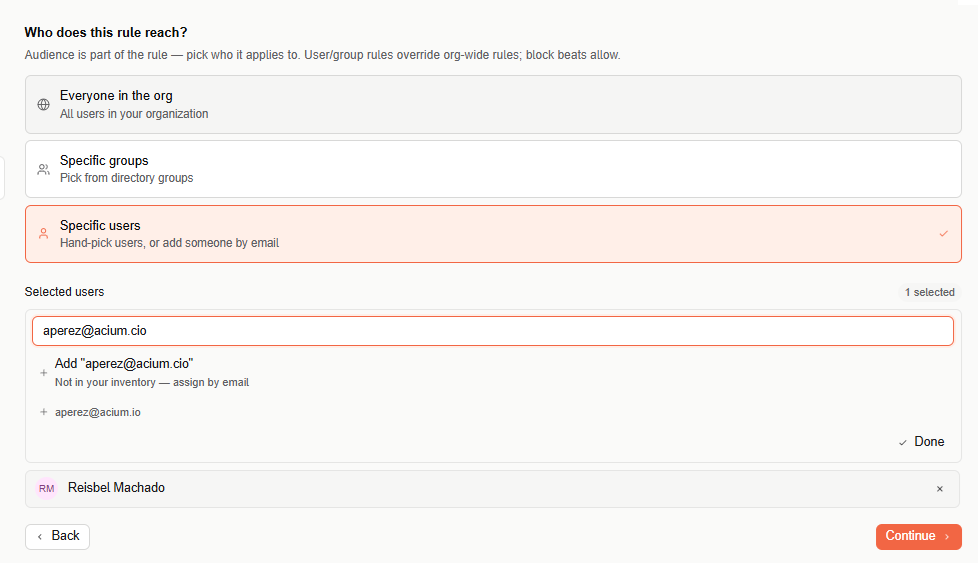
Specific users — search your user inventory and select a match, or type a full email address and select Add "email" to assign someone who isn't in your inventory yet. Selected users appear as removable chips below the search box.
Step 5: Review & deploy
Review the full configuration — name, restrictions, scope, and audience — before deploying. Select Edit next to any row to jump back to that step.
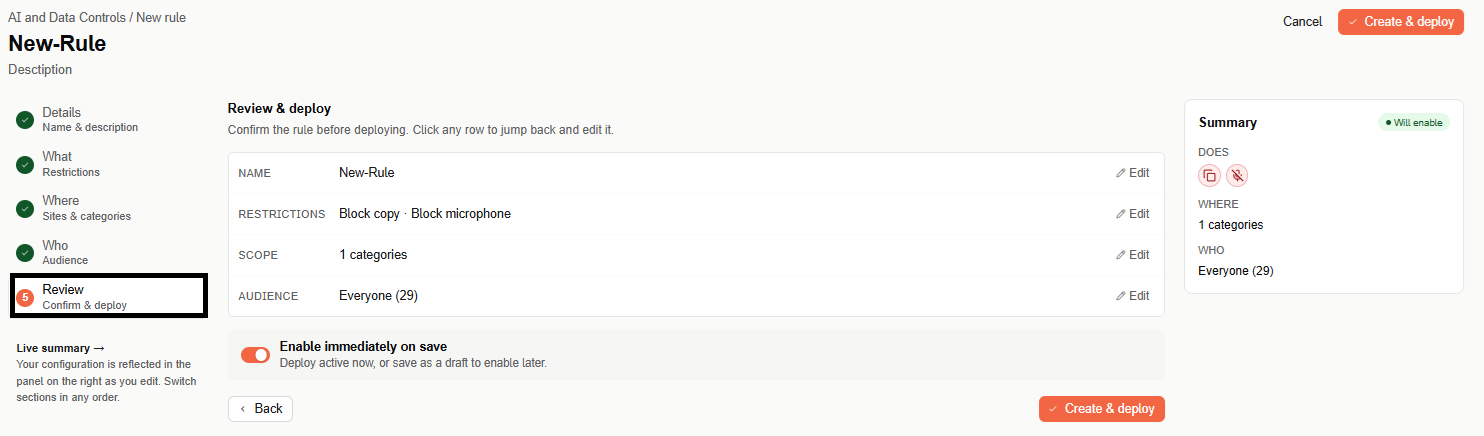
Use Enable immediately on save to deploy the rule as active right away, or turn it off to save the rule as a draft you can enable later. Select Create & deploy to finish — the rule then appears in the rules table on the main page.
Rules table
The main page lists every configured rule with the following columns: Rule, Restrictions, Scope, Audience, Status, and Updated (shown in the overview screenshot above). Use the search box and the Behavior, Audience, and Status filters above the table to narrow the list.
Select a rule's name to open it in the wizard for editing. Each row also has a ⋯ menu — currently offering Delete, with View details coming soon.